


Hi there!
In this article (and some others to come), We're gonna be going through how to set up some of your popular CMS platforms directly with Gatsby. It's going to be more like a series, so this first episode is going to be on Contentful.
Let's Dive into it!!!

So whether you're a newbie in web dev, or you're a seasoned engineer, you've probably already heard about Content Management Systems (CMS). Names like Contentful, Sanity, Prismic, Strapi, Netlify ...and WordPress are names that easily come to mind when you hear about CMS'. At this point, you might probably be thinking, WordPress?

I know, I know, WordPress? Although it sounds much more different from the others, it's actually also a CMS. The difference between platforms like WordPress, Wix, etc., and others like Contentful or Netlify is that the latter are known as Headless CMS. ie. they manage only the content strictly, while the former - Traditional CMS' handle the frontend along with the content it provides. You can read more about that here
Now that we know what our CMS is, what better framework to integrate it with than Gatsby?
Gatsby provides methods to easily fetch CMS content using their GraphQL API, and use the content to create pages during build time.
It also handles SEO quite well, has great developer experience and it's powered by our favorite framework - React!
Getting started
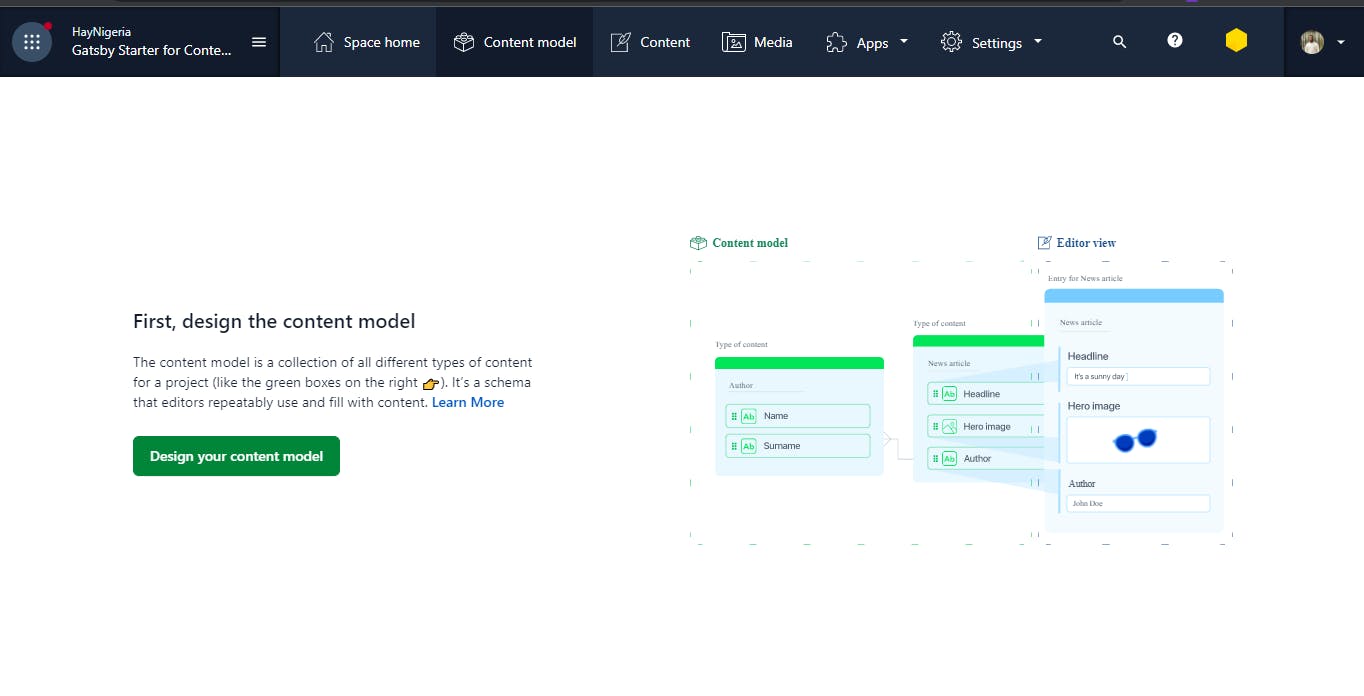
The first thing we need to do is to create a Contentful account. (duh!) Once we can access the dashboard, the next thing we do is to create a Content Model. If you're just creating an account for the first time, you should see something like this:
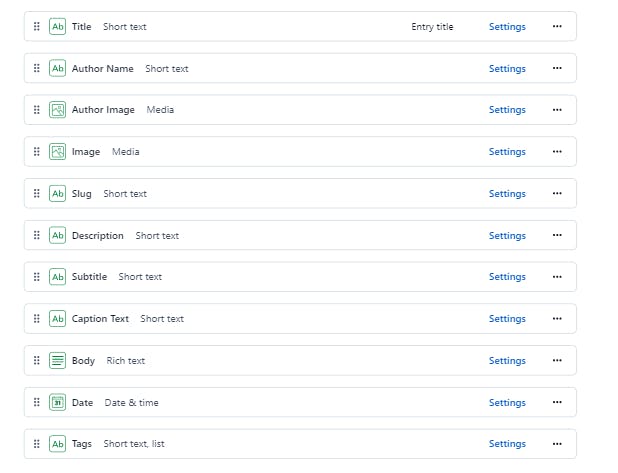
Now we can create the Content Model, which I'll call Blog Post, and it's going to look like this:
Once this is set up, we can go ahead to create the Blog Post content from the "Content" tab on the dashboard navbar. Now, cross over to Gatsby and set things up over there too.
Time to write some code!
We can easily get started with the gatsby project by running npm init gatsby which will provide us with the basic structure we'll need to get our gatsby project up and running. It's okay if you already have your gatsby app, just skip that part and keep reading.
Now that our gatsby project is ready to be worked on, we'll need to store important details from our contentful application that will enable us to link it to our gatsby app. We'll keep these as .env secrets.

What we're gonna do is to create a file named .env.development and it's gonna look like this
# .env.development
CONTENTFUL_SPACE_ID='xxxxxxxxxxxx'
CONTENTFUL_ACCESS_TOKEN='XXXXXXXXXXXXXXXXXXXXXXXXXXXXXXXXXXXXXXXXXXX'
To get our CONTENTFUL_SPACE_ID and CONTENTFUL_ACCESS_TOKEN, we need to go to Settings > API Keys where you should see something like this:
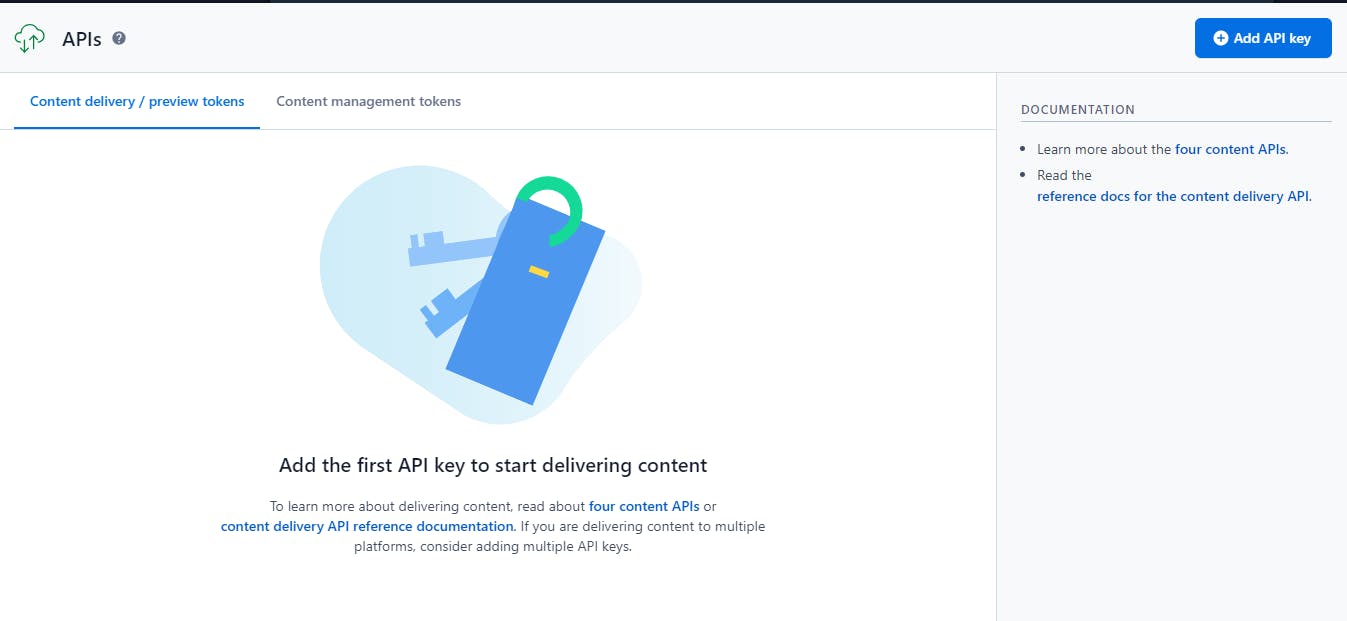
Click on the "Add API Key" button as shown on the top right of the screenshot above and scroll down a bit on the next page to see something like this:
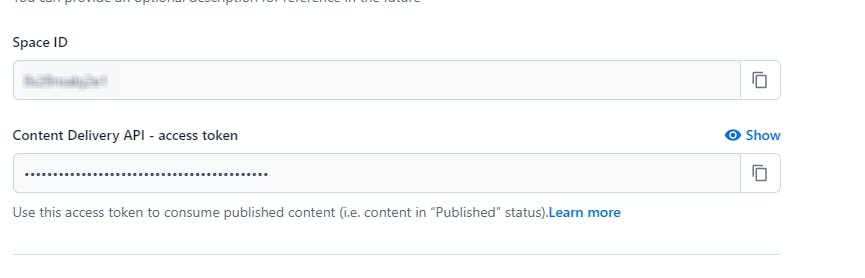
Copy the value of the Space ID as our CONTENTFUL_SPACE_ID and the value of the Content Delivery API - access token as our CONTENTFUL_ACCESS_TOKEN.
NB: The values in the .env.development should be kept secret, and so, should not be committed to Git, so you would need to add the .env.development to your .gitignore (if it's not already automatically added)
That done? Let's go on to our gatsby-config.js and set up contentful there.
Basically, we should update the file to look like this:
// gatsby-config.js
require("dotenv").config({ // You might need to install dotenv
  path: `.env.${process.env.NODE_ENV}`,
})

const contentfulConfig = {
  spaceId: process.env.CONTENTFUL_SPACE_ID,
  accessToken:
    process.env.CONTENTFUL_ACCESS_TOKEN
}

const { spaceId, accessToken } = contentfulConfig

if (!spaceId || !accessToken) {
  throw new Error(
    "Contentful spaceId and the access token need to be provided."
  )
}

module.exports = {
  siteMetadata: {
    title: `...`,
    description: `....`,
    siteUrl: `...`,
  },
  plugins: [{
      resolve: "gatsby-source-contentful", // You'll need to install this too
      options: contentfulConfig,
    },
//... other optional plugins
],
}
At this point, you've successfully been able to connect Contentful to your gatsby app. What we basically did was pass in the spaceId and access token (that we stored in our .env file earlier) to the gatsby-source-contentful plugin so that contentful can create graphQL schemas from our blog content and allow us to fetch them when we need it.
Now let's try to fetch and list all our Blog Posts and render them on our pages/index.js page.
We can easily do something like this:
// src/pages/index.js
import { graphql } from "gatsby"
import React from "react"
import Layout from "components/Layout"
import SEO from "components/SEO"

const IndexPage = ({ data }) => {
  const posts = data.allContentfulBlogPost.nodes
  return (
  <Layout>
    <SEO title="Home" />
    <div>
    {posts.map((post)=>(
        <div key={post.id}>
          <h3>{post.title}</h3>
          <p>By {post.authorName}</p>
          <p>on {post.date}</p>
          <hr/>
        </div>
      ))}
    </div>
  </Layout>
)
};

export default IndexPage

export const pageQuery = graphql`
  query BlogIndexQuery {
    allContentfulBlogPost {
      nodes {
        id
        slug
        subtitle
        title
        description
        authorName
        captionText
        tags
        date(formatString: "DD MMMM YYYY")
        image {
          gatsbyImageData(layout: FULL_WIDTH, placeholder: BLURRED)
        }
        authorImage {
          gatsbyImageData(layout: FULL_WIDTH, placeholder: BLURRED)
        }
        body {
          raw
        }
      }
    }
  }
`
Awesome right? We can easily use graphql page query to fetch and list all the content we created in contentful.

But we're not done yet...

Almost though, The next thing we need to do now is to use our Blog Post contents to create pages so we can view each post on its own single page using the slug field. That's where the gatsby-node.js file comes in handy.
If you haven't created it yet, create a file named gatsby-node.js and add this to it:
//gatsby-node.js
const path = require("path")

exports.createPages = async ({ graphql, actions, reporter }) => {
  const { createPage } = actions

  // Define a template for blog post and tagPosts
  const blogPostPath = path.resolve("./src/templates/blog-post.jsx")

  // Fetch all contentful blog posts
  const result = await graphql(
    `
      {
        allContentfulBlogPost {
          nodes {
            title
            slug
          }
        }
      }
    `
  )

  if (result.errors) {
    reporter.panicOnBuild(
      `There was an error loading your Contentful posts`,
      result.errors
    )
    return
  }

  const posts = result.data.allContentfulBlogPost.nodes

  // Create blog posts pages
  // But only if there's at least one blog post found in Contentful
  // `context` is available in the template as a prop and as a variable in GraphQL
  if (posts.length > 0) {
    posts.forEach((post, index) => {
      createPage({
        path: `/${post.slug}/`,
        component: blogPostPath,
        context: {
          slug: post.slug
        },
      })
    })
  }

}
Here, we're using the createPages export to make a quick graphql call to fetch the contentful posts, each item in the array will contain the title and unique slug of the post (In this case, we're using the slug as the unique identifier, you might decide to use the id if you want).
Once we get the response from graphQL, we use the forEach method to loop through each post item and use it to create a page using the createPage function. We're passing the slug as a context parameter so we can use it to get the post we want to display with the blogPostPath template component.
But first, we need to create the post template component at "./src/templates/blog-post.jsx". This file is going to be used to fetch and display the specified blog post. It can look like this:
// src/templates/blog-post.jsx
import React from "react"
import { graphql } from "gatsby"
import Layout from "components/Layout"
import SEO from "components/SEO"
import { GatsbyImage } from "gatsby-plugin-image"
import { documentToReactComponents } from "@contentful/rich-text-react-renderer"

function BlogPostTemplate({ data }) {
  const post = data.contentfulBlogPost;

  return (
    <Layout>
      <SEO
        title={post.title}
        description={post.description}
        image={post.image?.url}
      />
      <h1>{post.title}</h1>
      <caption>{post.captionText}</caption>
      <p>By {post.authorName} on {post.date}</p>

      <GatsbyImage
          alt="post image"
          image={post.image.gatsbyImageData}
        />

        <div>{documentToReactComponents(JSON.parse(post.body.raw))}</div>
    <hr />

    </Layout>
  )
}

export default BlogPostTemplate

export const pageQuery = graphql`
  query BlogPostBySlug(
    $slug: String!
  ) {
    contentfulBlogPost(slug: { eq: $slug }) {
      id
      slug
      subtitle
      title
      authorName
      description
      captionText
      tags
      date(formatString: "MMMM Do, YYYY")
      image {
        url
        gatsbyImageData(layout: FULL_WIDTH, placeholder: BLURRED)
      }
      authorImage {
        gatsbyImageData(layout: FULL_WIDTH, placeholder: BLURRED)
      }
      body {
        raw
        references {
          contentful_id
          url
          title
          width
          height
          description
        }
      }
    }
  }
`
Here, we're querying our post by finding the post whose slug matches the slug that comes with the page's content. So if our URL looks like "localhost:8000/what-is-up", we are going to find the post whose slug is "what-is-up" and return the details of the post (or return a 404 if we can't find such a post).
Wrapping it up
We've been able to set up our contentful dashboard, connect it to gatsby, fetch and list all the content we created in contentful using the graphql schema that gatsby-source-contentful provides, and we've also been able to create pages during build time from posts in contentful. I hope that you've picked up a thing or two and you can now confidently start using Contentful in your Gatsby applications.
Note that I didn't go into the styling of the UI in order to keep this article streamlined to the purpose of integrating Contentful with Gatsby. However, In your app, you'd definitely want to make the site a bit more beautiful.
Well, that's all for now. Drop a like or a reaction if you enjoyed this read. Feel free to let me know in the comments if you have any questions, observations, or suggestions. Also, watch out for subsequent articles where I'll be showing how we can integrate gatsby with other CMS platforms easily.

Till I come your way again, have fun, and happy hacking! 🚀